

Hi everyone !
I’m back in the movie props reproduction’s business with a new tutorial, this time evolving Stargate. I won’t introduce you my favorite tool : papercraft.
Just a little reminder for those who haven’t read my last articles and for those who don’t know this technique : papercraft is an art which consists in making paper models. You shouldn’t smile, you’ll be impressed to see how much we can do with only paper and glue. I’ve seen pictures of full scale Link, Hulk, Dragon Ball Z characters, not to mention ultra realistic vehicles reproductions, and all of them were papercrafts. As far as I’m concerned I do not print textures on paper because all my assemblies end up covered with resin and painted.
In order to do it, you’ll need a computer, Pepakura software (the free version downloadable on the official website is good enough), and the file of the papercraft you’d like to build (in .pdo). Don’t worry, they are easy to find on the web, and there are lots of choices. And of course you’ll need paper. You should take paper with high paper density, at least 160 grammes, otherwise the model should collapse. You will also need glue, scissors and a cutter.
That’s it for the paper part. Subsequently you’ll need some polyester resin, the same that is used by your garage mechanic. As it drops toxic vapors you’ll have to do it in a well ventilated place, or better : outside; you will also need a cartridge mask, some glass-mat, finishing mastic (generally used for cars), paint, a dremel and glass paper of different caliber (in my case I used 80, 130 and 240). A glue gun is not mandatory but would be an advantage ! The back-lit eyes are made of a flashlight and colored transparent plastic sheets. At last you’ll need some acetone to clean up the tools.
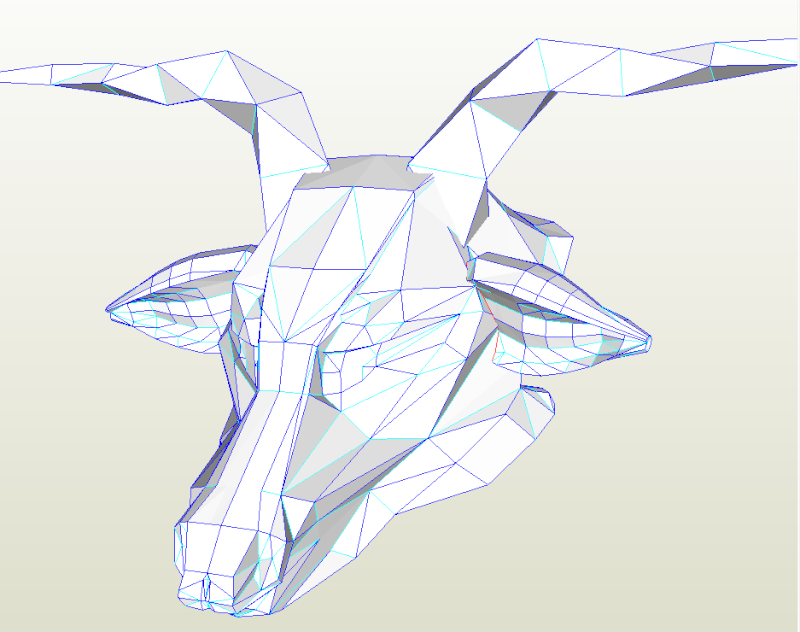
1. The paper model
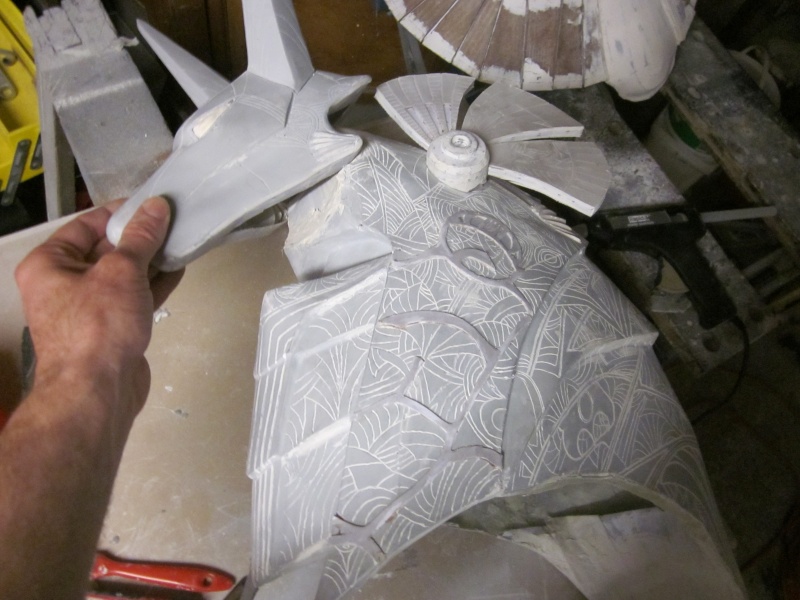
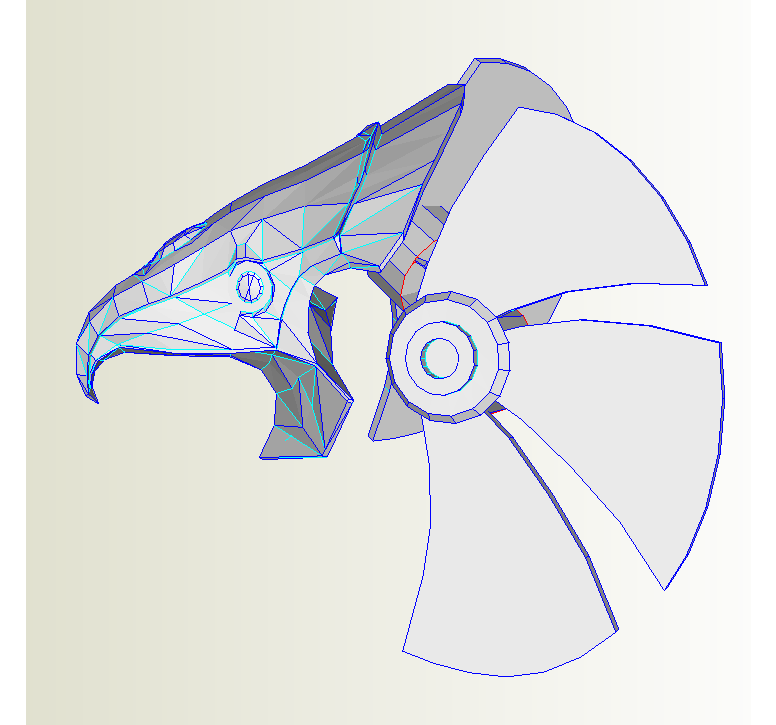
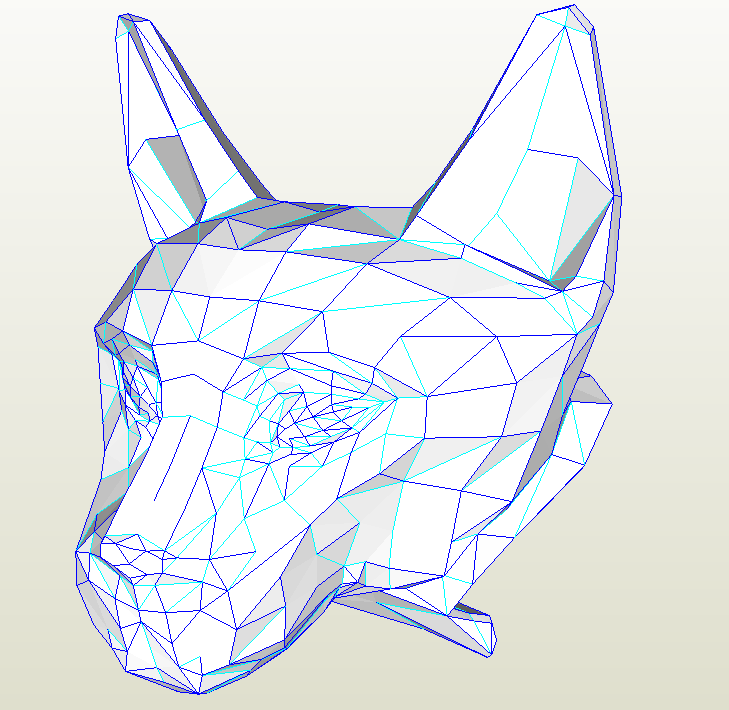
Here are the files I used to build Anubis helmet. The head, the chest and the necklace. The chest originally came from the Horus files. I didn’t print the falcon head that was included in it but the jackal one that I found separatly.
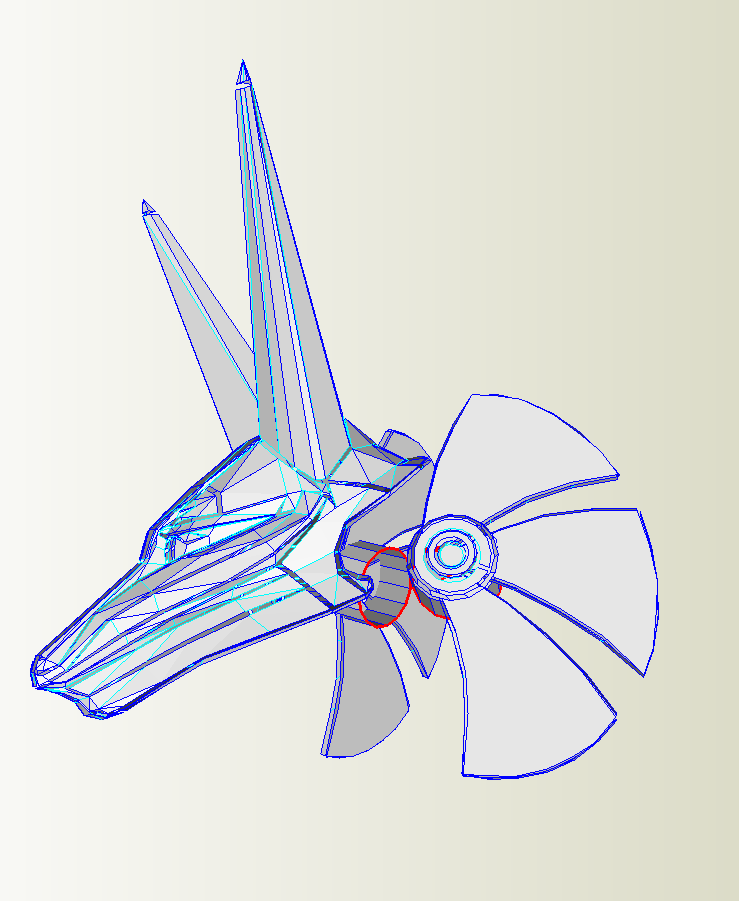
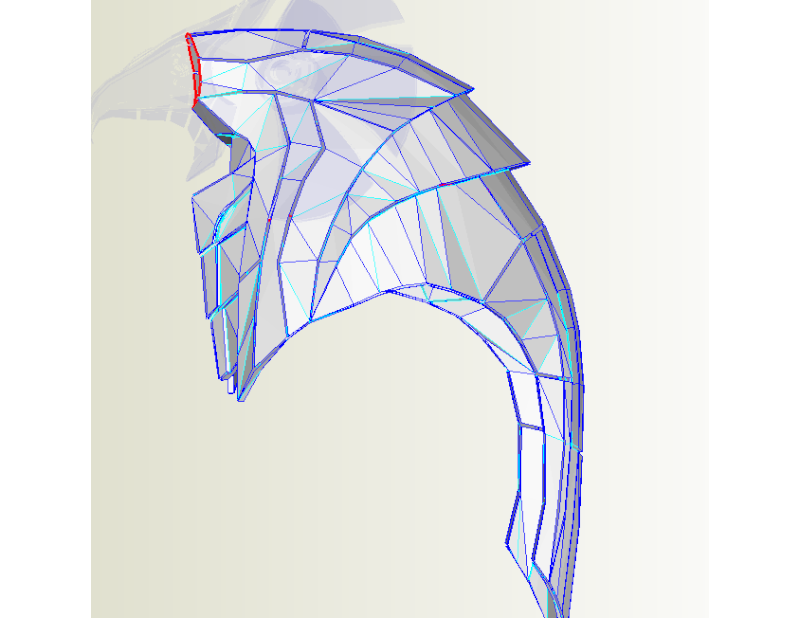

After hours of folding and glueing I have all my Anubis parts in full scale.
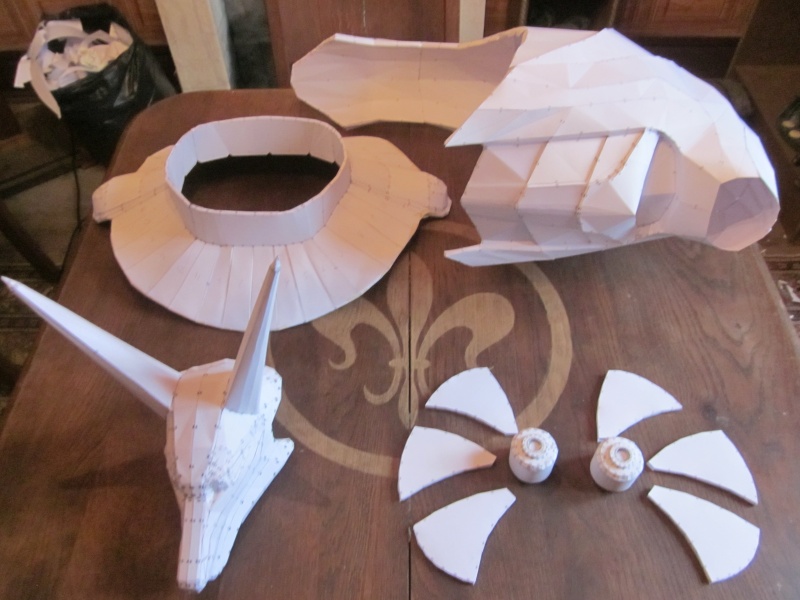
I have cheated a little for the necklace. Instead of making all the three dimensional parts in papercraft, I made it “smooth” and I”ve added those elements later by glueing some piece of board. Much more simple and solid.
Well, this part is over, so let’s go to the garden for the next step !
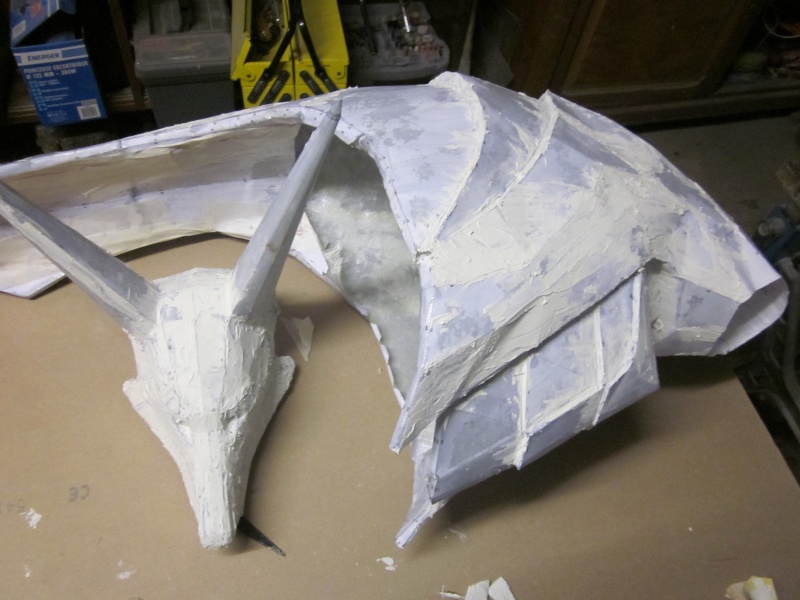
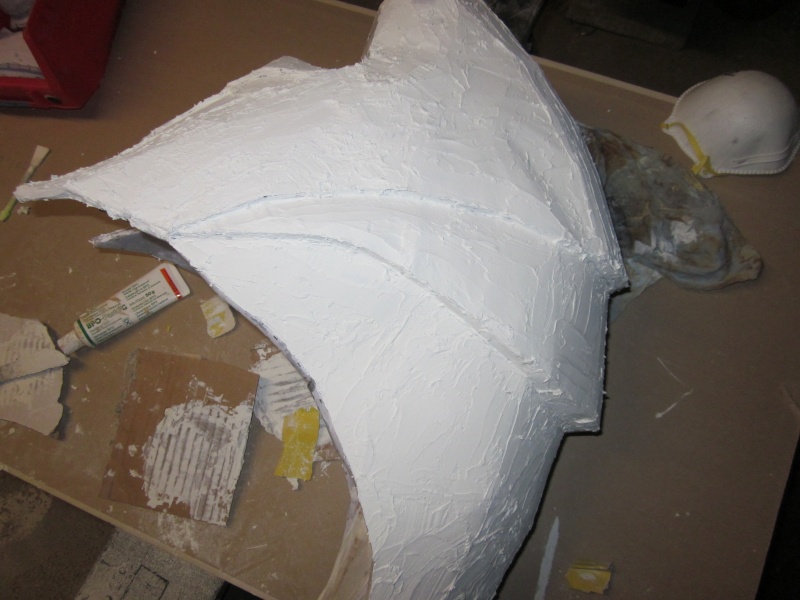
2. The resin layout
The principe is simple. First we have to make our special resin (mixture with resin and 5% of hardening agent), and then we spread it all along the model’s surface with a paintbrush. The paper will be soaked in resin and will laminate while drying. That’s why it’s very important to work with high density paper. The assembly must support the weight of the resin without collapsing. I like to work with slow polymerisation resin, it gives me the time to spread it more efficiently.
Once it is done, we’ll have to do the inside, but this time with glass-mat. That’s what will stiffen the assembly. The day I’d like to make a papercraft cosplay I won’t hesitate to put 2 or 3 layers of glass-mat, but for my models that are just made for display, one layer is enough.
The jackal head is a model totally closed, we have to cut it in order to access to the inside. I’ve cut it under the chin and then I’ve glued it back before the painting.
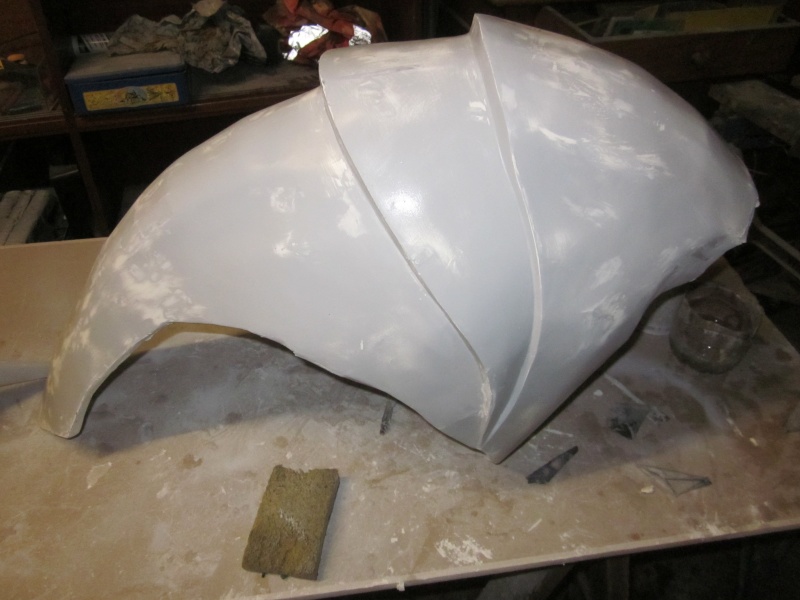
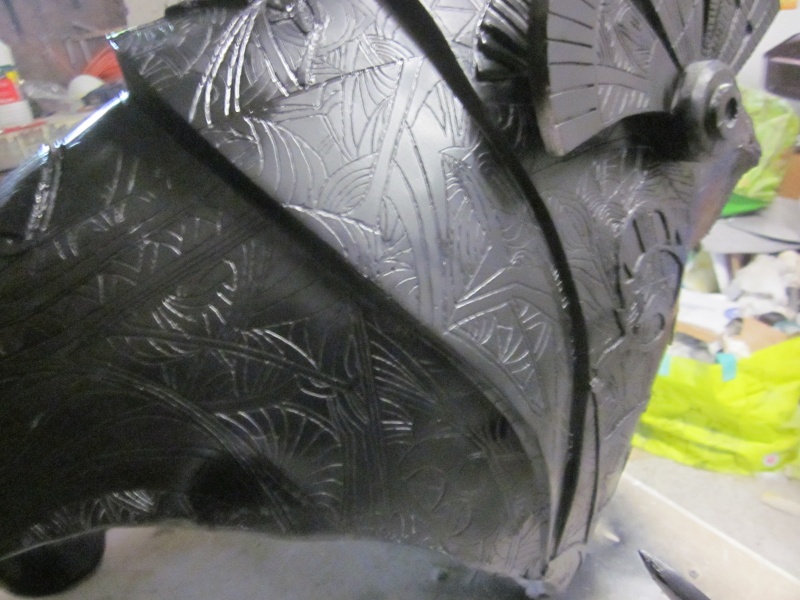
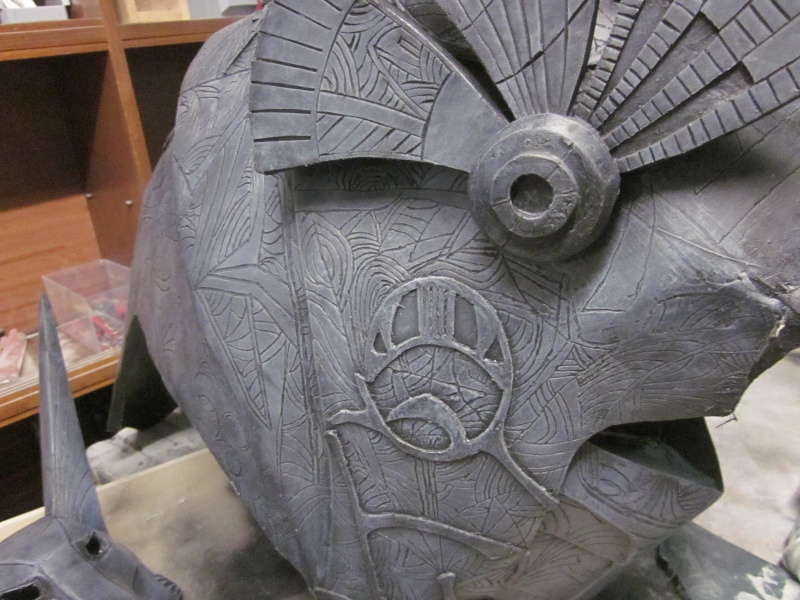
3. The engraving
Once my model has hardened, I’ve spread on it a large layer of finishing mastic. And that’s when things started to be painful. In order to get a slick render, we have to sand the mastic. But as we sand we make some defaults appear, so we put some more mastic in order to hyde them, and we sand again… it’s neverending ! Sanding is a very boring step.
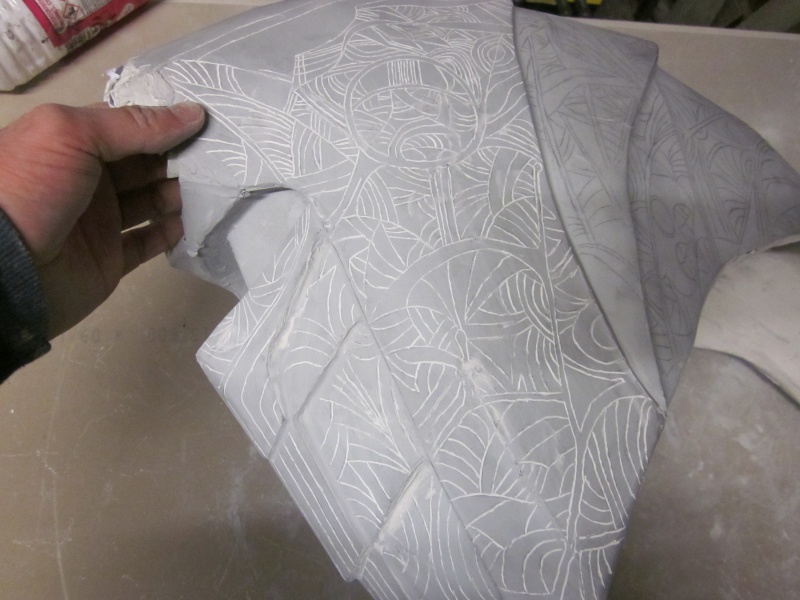
Finishing mastic is very crumbly, usually I prefer not to put too much of it on my assemblies, but this time I had no choice : I had to engrave groove pattern all over the surface, in order to do it I had to put a 1 millimeter layer of mastic.
After few evenings, the result is slick enough and we can start to duplicate the pattern. If you want to stay faithful to the movie there are a lot of pictures of them on the internet.
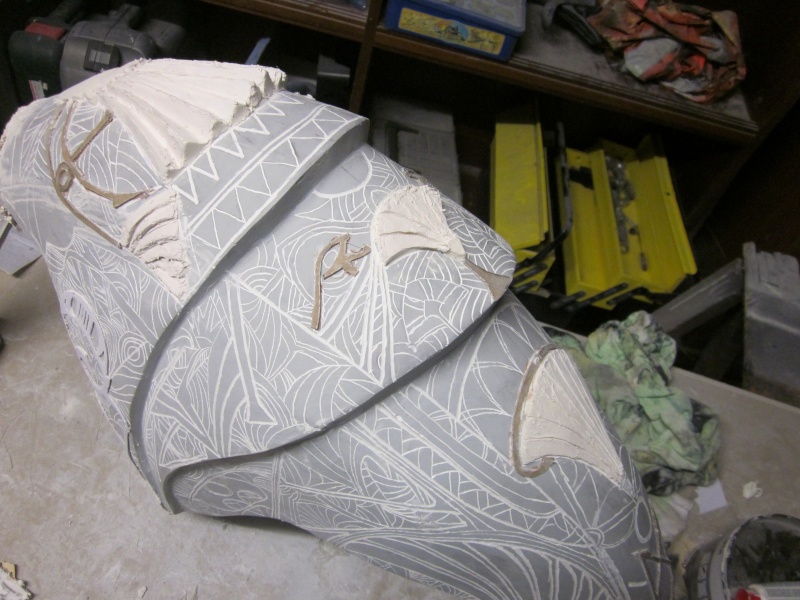
After few more evenings engraving the pattern we can finally start the three dimensional parts. I’ve made mine with piece of boards and modeling clay.
4. Painting
It’s now time to do some serious painting job !
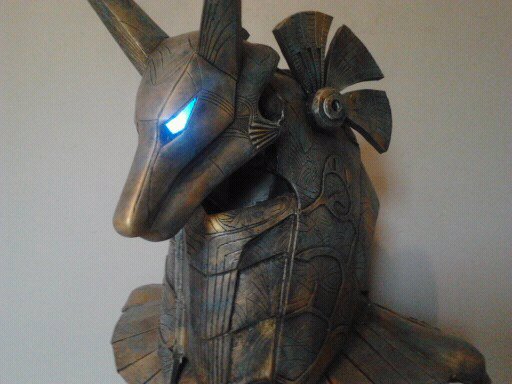
First I painted everything with a black paint spray. Then I’ve made some black wash drawings to highlight the hollows. I’ve operated a dark grey brushing and I lightened it with a second brushing 1/2 black 1/2 light grey, then with a third one. When it was at my taste, I’ve applicated a brushing based on 1/2 copper + 1/2 gold in order to simulate marks of wear. I ended with a pure gold brushing on the most important metallic traces. Finally I’ve added an aging effect, I’ve brushed some specific areas with blue.

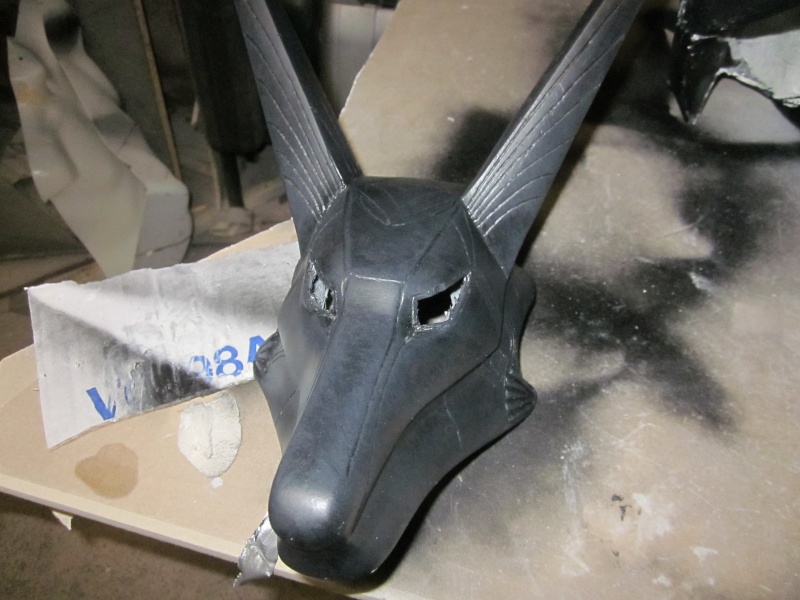


It’s during this step that I made the eyes. They are cut in a bottle made of blue plastic, the lighting is produced by a little flashlight tied to the neck.


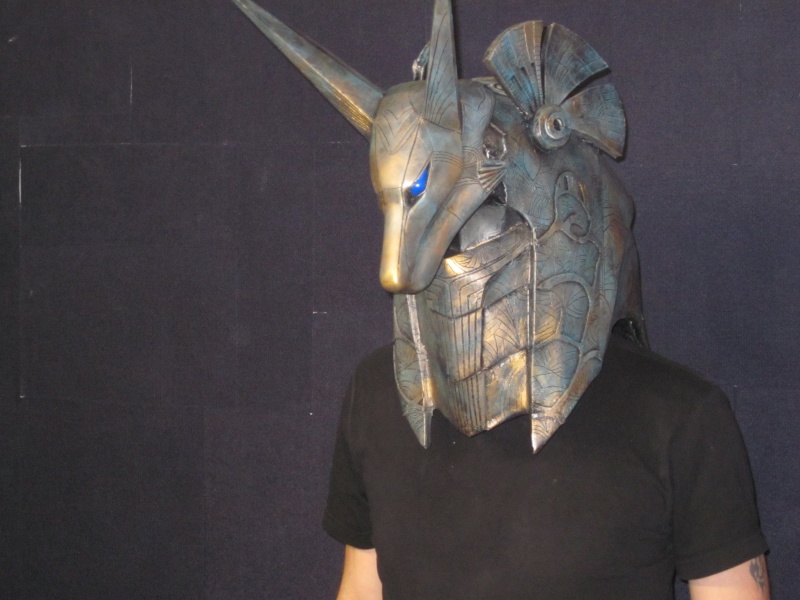
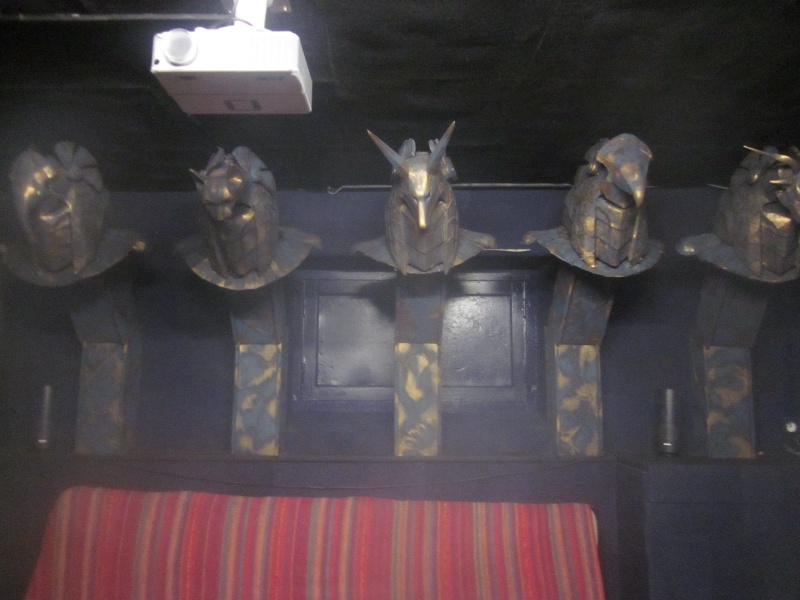
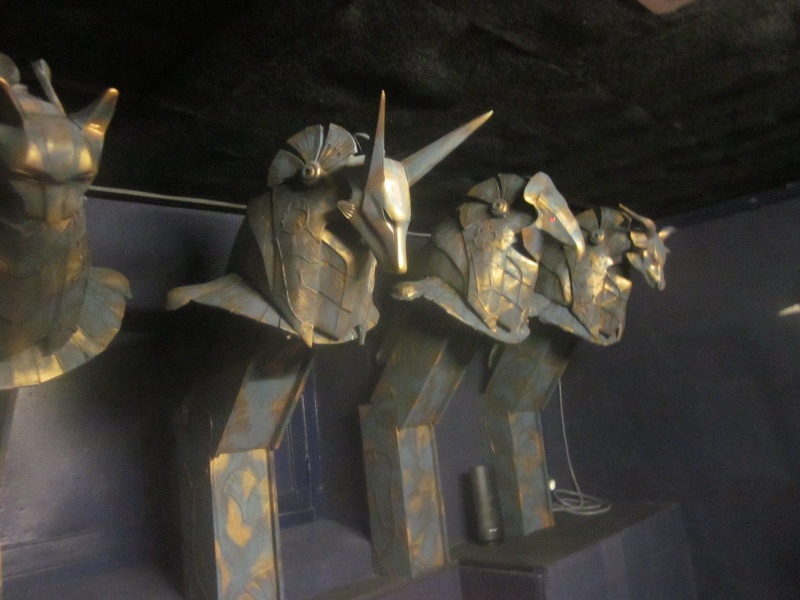
Here is the final result.
5. and then?
For the record, I was so pleased with this helmet that I decided to make 4 more , with different animal heads.
I’ve taken the Horus file (photo 1), !i’ve asked a friend to modelize a Bastet (photo 2) and a Thot (photo 3) and then I’ve altered Anubis file to make a Khnoum (photo 4).
You won’t find them on the web, only Horus exists, the other are unique copies.

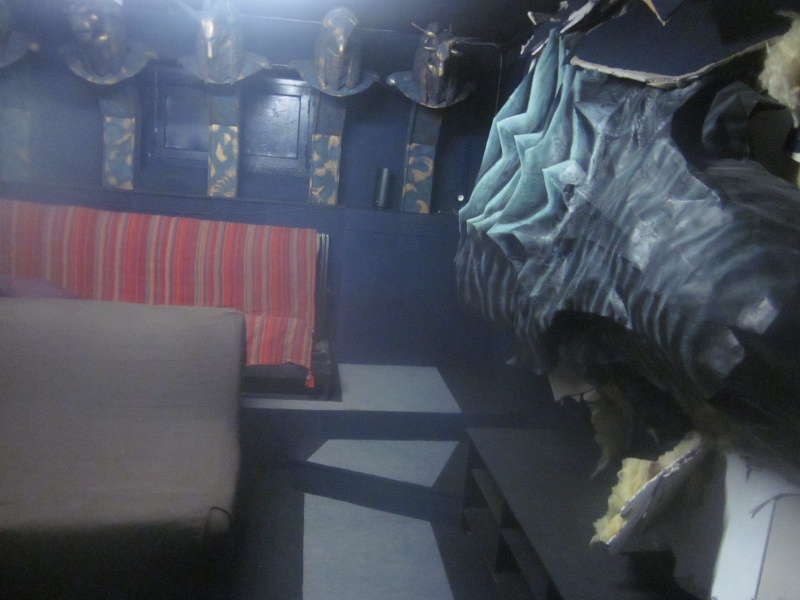
And here are all the final pictures :

And after few months and hundreds hours of work…….


23 Comments
hey I was wondering if you have the pdo files for Bastet, Thot, Khnoum and if you could email them to me it would be much appreciated.
just wanted to say what a great job and any chance of getting the pdo for anubis ive been looking everywhere
Hi.
I think you can found the .pdo of Anubis here:
http://zealot.com/threads/stargate-anubis-and-horus-headress-1-1-need-beta.170365/
Plz cat head for pepakura
Superbe … je cherche des références pour Anibis sculpture pierre et Super Sculpey pour ensuite cuisson etc … Vraiment du beau boulot . Merci pour l’inspiration et le,beau travail .
Anubis … désolé .
How did you go about the engraving part and how did you plan the lines so smooth and evenly?
Amazing work, I’m so doing my own in the new years !
all the graving part was made with a dremel
Ok i get that buddy but how did you not go through it, how deep did you cut into it and what head did you use to carve it out ? Also when it comes to the goa’uld lines and markings how did you mark them out correctly? did you print it out first or is it all done by eye?
Thank you for the reply 🙂
I drew at first lines in the pencil (I found the models of goa’ uld on the Internet) and I sculptured them with a small conical tip on approximately half a millimeter deep
Man you rock .
can i get the pdf template for free?
I think the pdf doesn’t exist. I’ve just found the pep file
Nice, well done!
c’est superbe bravo ,je suis admirative !!!cordialemen tPat
Bonjour je ne trouve pas les liens en pdf pour la tête et le buste anubis …meme sur pepakura.
Serait il possible quelqu’un m’envoie un lien via mon email please…
Bonjour
il faut un compte 4shared mais ils sont téléchargeable ici:
https://www.405th.com/forums/threads/pepakura-stargate-files.24131/
any chance you could upload the bastet head and such? sorry if this is a doublepost, its not showing up for some reason
thanks in advance
sorry, like many other files I’m afraid I lost those in a PC crash a few years ago
DO YOU MAKE THEM FOR SELL AND WHAT WOULD THE PRICE
I tried to contact you by email but it does not work
Would you be willing to sell the horus and if so how much?
Sorry, they are not for sale